I discovered the technique in Scott Kelby's LR2 guide book. I like his style, although some will hate it (just like
marmite). I followed the technique as outlined - just as well because believe me I haven't got a clue how anyone worked this one out - there is nothing intuitive or logical in it to me (Kelby agrees - I feel better for that).
Oh, yes, High Dynamic Range - essentially its about merging separate shots of the same subject to produce the best possible image. The core idea is that you shoot one at the correct exposure and then one (or more) under and over exposed. The quality of
darks, shadows and highlights of the 'merged' image dramatically improves. And, I have to say, even on only my first trial I'm getting the feel that all those magazine landscape covers are using this technique.
For
HDR you have to shoot 'RAW' to be able to process it in
Photoshop and that causes pain with the Nikon D70.
Setting the camera up was a real nightmare. I searched endless blogs for guidance. Everyone was having the same problem (its not intuitive on a Nikon D70). In the end it was down to reading the Nikon manual. If you ever recall those 'mystery books' as a child where you can choose the next step (go to page 10. for the Study or page 15. for the Library) - no! Well, anyway, you start at page 87 then get directed to 146 then to 135 on to 90 then to 144 and then to 35. There's a logic, but my advice, don't worry go with it (there's a song a there somewhere).
Here it is if you've got a Nikon;
There's a white bracketing option - but as it doesn't do RAW lets move on. Flash Bracketing - now lets come back to that in another section.
Then there's exposure bracketing -
that'll be the one then. It can only be used with Manual, Aperture or Shutter priority modes - and Programme mode (a programme that you have created for the camera to follow).
The Nikon will only bracket 3 shots in RAW (and I'd love to see the effect from 5). Bracketing 9 shots sounds wild.
Go to your cameras menu, choose the pencil icon, then option 12.
BKT and select
AE & Flash.
Then go to option 13.
BKT order - I chose 'Under>
MTR>Over' - it does what it says - takes the shots in sequence - Under exposed - metered - over exposed.
Now to option 9. EV step - here you choose whether to keep the exposure adjustment to 0.33 steps or 0.5 (I chose 0.5 because with only 3 shots to play with I want maximum impact - if I had 5 shots to play with I would give 0.33 a try for more subtlety).
The maximum +/- exposure that bracketing will accept is 2 stops (and then it limits you to 2 shots, but at least you get to choose whether the 2nd shot is + or -.
Now to it. Press the
BKT button (just below the mode selection dial on the left) then rotate the main dial (rear right of camera) and look for
BKT in the LCD. Now rotate the sub command dial (front right) and choose the stop increment (notice it wall also display the number of shots 2/3.
That's it happy days.
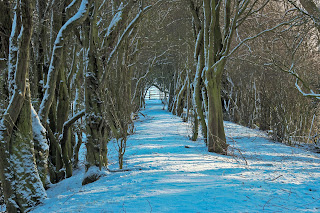
With that snow fall (winter 09/10) I got out in to
Coton Forest, the light was low, shadows and highlights I thought - lets see what
HDR does. I took a load of shots (all bracketed) and played around with various stops. The Nikon takes the shots as set up, mine from - to + (e.g. choose a full stop at '0' and it'll take them in sequence '-1', '0', '+1'. Now here's the interesting bit it won't take them automatically - you have to press the shutter x 3 (the LCD display shows if you've taken the 1st, 2nd or 3rd shot). Here's why that's not good. 'Clouds move'. You're set up on your tripod and press that shutter x3 as quick as you can (without causing any vibration) - but the clouds, yep, they've moved.
So for my next camera (whenever and whatever that is) I want auto shoot in bracketing and I want 5 shots.
The Shooting Process
This gets messy when you're first learning it.
Take a test shot to check composition and exposure (to set the initial stop for bracketing). I used the histogram on the Nikon for exposure, keeping it slightly towards dark (I prefer deep blacks and shadows).
Check the histogram, adjust a stop (or 2 if needs be) take another shot (beware you're not in bracketing mode, otherwise you've now got to reel off x 3 shots).
When you're happy with the histogram go to bracketing mode and set that exposure, and shoot x3.
It took me a while to get used to - taking off bracketing mode (otherwise you've now got another 2 shots to reel off), making sure the composition is right before I took the test shot for exposure, testing exposure (using the histogram) resetting to bracket mode (otherwise you'll now take 3 shots of the same exposure). Then of course if the light changes or you want to adjust the composition - you're back to step 1 in the whole process.
3 TIPS
(i) Use the image taken for exposure testing (metering) to also check you're happy with the composition. It's little hassle to adjust composition at this point and take another test shot.
(ii) Shooting RAW takes up space - lots of it, so delete the test shot after you're happy with the exposure and composition. It's the bracketed shots you're after and the middle one will be at the exposure you chose in the test shot anyway.


