Showing posts with label P4. Show all posts

2.2 Studio Know How - Lighting & Equipment

Light quality is often considered the single most important factor in photography. In a studio their are no rain clouds, bright sunlight or setting suns. The photographer has complete control over the set up. The only limitations are space, equipment, ability and perhaps most of all - imagination.


The Burton studio comes equipped with 4 x Bowens Gemini Esprit 500 compact flash (the 500 indicating the maximum capacity of the light in watts). When used on full power the cycle time is 1.5 seconds and quicker at lower power. A discharge switch ensures that, when moving from higher to lower power settings, follow on shots are not incorrectly exposed.


They all come with a model lamp that can be dialled up or down to show where light and shadows will fall allowing the photographer to set shots up quickly and make creative decisions and adjustments with greater ease. The flash unit can also be used on location.


Here's the light before the use of attachments, showing the dials for model and flash lamp settings.


At the rear of the lamp we can see the switches the beep is very useful as an audio guide to whether all lamps have fired or not. The very necessary lamp with - maintains the power in the lamp but enables it to be switched on off during the shoot for various lighting requirements. E.g. shoots with and without back lighting of a full length body shot lit bottom and top followed by the same shot with light only on the upper body.


The cell enables a very simple, very useful but tricky to explain functionality. Lets explain it in a logical sequence of events. The camera has the trigger, the trigger fires one of the lamps with the corresponding unit. That leaves three lamps to be triggered. Switch on the cell/s and they will synchronise - very important. 


Lights
The two main sources of light are tungsten (red heads) and flash. The tungsten light remains on all of the time, it is constant.  The flash is used to light the subject and only when activated (fired) as described above. To help each flash comes with a modelling light to help set up the subject. The modelling light can indicate where light and shadows may fall.


In the studio, once we are ready for shooting we work with the modeling and flash lights only. Tungsten works on a different wavelength and will give our pictures a yellowish glow (we've all go some of those in our family albums).

Soft Boxes


The main aim of the soft box is to provide 'diffused' light - providing a soft light that provides gentle highlights and soft shadows (no hard edges) and even coverage. Great for product / still life photography.  Allows greater control than an umbrella. This will be my main light source for the portrait shoot. The model's skin tone will absorb some light and I'm expecting to need stronger highlights than a brolly would provide.


This diagram shows the component parts for a soft box. The outer skin (1), steel rods for creating the shape (2), the speed ring (3), inner diffuser and outer diffusers (4&5) and the outer bib (6). The speed ring enables quick attachment and release of the constructed softbox to/from the flash lamp. Some speed rings also enable the softbox's position to be adjusted


Barn Doors
A set of four clips that are used to control the light source - thus attached to the light source. Warning. they get very hot and should only be adjusted with a 'door key'. (remember that Joe). I plan to use these in the Subutteo product shoot.


Umbrella
The brolly. Shown here in an Elinchrom D'lite kit (see what they did there!). Mainly used in portrait photography. The flash is fired in to the umbrella and back on to the subject. This diffuses the light - causing in to bounce around the umbrella before landing back on the subject. The light will flood the subject area providing soft shadows and smaller reflections than the direct light source from a softbox. Another warning Joe - they would melt if used with a continuous light source.


Snoot
Snoots give a very directional circle of light. This will be perfect for the Subutteo shoot where the light will be used to recreate the effect of floodlighting. Great for casting shadows and highlighting specific areas. They can be used to create a spotlight effect on subjects.


Reflector


Usually used to lighten shadows and are more subtle than using additional light sources. When used for very specific applications they enable careful control of shadows e.g. allowing enough light to allow details through but not so much that it distracts. They come in many shape, sizes (and price ranges). Coloured sheeting/card can be used to great effect. This Bowens kit demonstrates the extent of options available.


Lastolite are probably the market leaders in diffusers and reflectors here's an example of their tri-grip reflector in action. They can also be used with stands.


Honeycomb
Fitted to a spillkill the two types of honeycomb provide either wide or narrow pools of light. Great for lighting specific areas and creating soft edges.

SpillKills


Help to control light direction (reducing reflected light) and create shadows (less so if close to the subject).


Light Table

The object of product photography is to show details of an object clearly. Lighting an object well brings out details and provides pleasing highlights and contrasts. One method for controlling the lighting of small objects is to use a light table. This table was used in my trial product shoot.


The Gemini Classic 500C features the unique ability to easily integrate with the Bowens Pulsar trigger - a device that sits on the hot shoe of the camera and simultaneously fires the flashlights.


Lightmeter
An essential hand held device that can be used to measure both reflected light (light coming from the subject) and incident light (light falling on the subject but prior to hitting the subjects surface). 
 
The lightmeter will come fitted with a diffuser (the white dome shown here) which is slid back for taking reflected light readings. The meter is then pointed at the subjects surface. The reverse is true for incident readings. The diffuser is closed and the meter placed at the subject's surface and pointed towards the camera. Incident readings provide a good average. I will use incident readings for my portrait and product shoots.


This one is the ever popular Sekonic range the L-358 Flash Meter.


2.4 Studio Trial - Product Shoot - Toys

The Lighting Set Up
Photobucket
The lighting position was inherited (i.e. it was already in situ) and as this was my first time in the studio we (myself an Steve, our tutor) agreed to allow my focus to be on learning the basics as opposed to spending time on moving lights around (when I wouldn't really know what I was doing anyway).

A soft box to the rear right and left with a snoot to the left - all lighting to the rear of the toys - not what I had intended. The idea I had was to get some front light as though the figures were looking towards a sunset.


Having read around the subject and in particular 'Light, Science & Magic' (3rd Edition - Hunter, Biver & Fuqua) that the soft boxes are well placed and would have given a nice diffused light with soft shadows. Had the snoot been positioned at the front it, then its high contrast light could have been used to simulate daylight with its direct light providing hard shadows. Positioned low enough these would have provided long, hard shadows, that may have diffused a little from the back lighting of the soft boxes. A gel could also have been used to slightly soften and colour the light to more closely mimic the colour of sunset light.

The uplighter lamp can also be seen. Its hard light becoming very diffused and refracted by the tables translucent composition (known as diffuse transmission no less). The table surface would also absorb some light, helping to removing light bouncing around and causing unwanted highlights.

The Camera & Subject Positions
Photobucket
I positioned the 'farm' at a slight angle with the figures coming out towards the camera. The camera itself shooting straight down the 'table'. Had the snoot been positioned at the front, because of the subjects material (dense 'shiny' plastic) then reflections would have become a problem - we wouldn't expect to see reflections from a low sun. A thin material to provide some diffused transmission - a mid-contrast light (see I've read the book, well o.k. the early chapters so far) would have solved this problem.


The First Shots


All pictures were taken on ISO 200, the fastest possible on a Nikon D70, and all at 1/60th exposure. These two being constants all (like it was nothing), so I repeat all, I had to think about was lights and aperture (yes all on manual focus, so that too, smarty blooming pants).


N.B. None of the pictures have been touched in LR2 or CS4, so what you are seeing are the images as they came out of the can (Mr Hollywood's in town). Yep, you can see the cr@p on my lens (please don't let it be on the sensor) too.


The reason for this is so that you (I) can see the impact of the light/aperture settings. A levels adjustment would make my learning impossible.


This first shot was at 48mm - a compromise of widest angle that could achieve the focus and crop. I got the lights to f8.0 - it felt about the right aperture and I'd read that the Nikon 28mm-80mm lens that I was using was optimum between f8.0-f11.0 (depending on where/what/who).


I was pleased with the depth of field sharp to blurred but still evident what it was - thus emulating the blur you might get in real life for the subjects over a greater distance. Wasn't happy with the light though.Did a shot at f11.0 that gave me the right light (slightly too dark but could bring that back in photoshop with levels). There was an impact to depth of field but I liked f11. more the blurring was softer.


Lights Go Out!
Photobucket
As you can see from this shot I had a light failure - the two soft boxes failed to sync and so I had to switch them off and work with just the snoot - which started to challenge my ability to get depth of field and lighting how I wanted. Reflections were becoming too hard (even greater diffused transmission required) Just a gentle touch on the snoot power was making a major difference to the light in the final image. The relationship was too sensitive for my limited knowledge. A small adjustment in power was having a disproportionate effect on light in the image.

Here's the first image shot after the soft boxes failed.


Love the long shadows, just like at sunset. It's exactly what I'd wanted from the front. If the this light was from the front I'd just need to get f11.0 for the depth of field and those soft boxes back for a bit of diffused light at the back (don't mind if I don't say diffused transmission, no thought you wouldn't). There are a half dozen shots between the shot above and this and I'd ended up at f5.6 for no other reason than getting used to adjusting the lights, taking a reading and getting the subject to camera reading to the aperture I required. I had loads of fun with this. I guess only photographers would describe such an iterative process as fun But there it is - it was. I was in the 'flow' (that's a whole other subject) maybe you know it as 'the zone' - when time passes unnoticed.

The image, as you can see, is too dark. The Bowens Esprit Gemini (GM500) was set at 3.5 (the other two lights with soft boxes are the same model), the camera at f5.6 and light reading at f5.6 (lens at 28mm - widest possible to maximise depth).

In the next shot I went with 4.0 on the Bowens


 I then went for  a more dense image with the figures closer together and the lens zoomed in, with a shallow depth of field.

Photobucket


Far too much light really. But I'd decided I wanted a close up now anyway. So camera to narrowest angle (80mm) and move on in. This following shot was withe the Bowens on 4.0 lights on f5.6 and camera at f5.6


I like close ups (we call it macro Joe), I like this image, the cos burned out the horse is blurred and they on a sloping boat but hey it was a mad time with the lights and I like this 'neon light' effect. The farmers taken the animals to Tokyo and they're enjoying the light show (too much Babe in the City Joe).

Went for a slightly wider view (78mm) more depth of field, f8.0 and lights at f8.0. If it was a product shot then getting the detail would be important. The pigs are a bit out of focus and so f11.0 should solve that, as well as changing the focus point. Here the farmer is still the focal point although he has moved behind the pigs (earlier he was at the front with depth of field moving away from him). I took another shot with the Bowens down a notch (was still getting and f8.0 reading) but the image was darker, the chicken had detail. That would be the image I would work on in photoshop - bringing out the details.


A Farmer Portrait
Photobucket
And finally a single figurine takes centre stage - lots of challenge around the single light and depth of field.

I then moved on to a selection of Farmer portraits, here's a list of some of the combinations I tried with the one Bowens light, snoot, no diffusion (did I mention I only had one light - do your best Steve said).


Bowens 4.0 - Reading f8.0 - Camera f8.0 = too bright
Bowens 3.5 - Reading f8.0 - Camera f8.0 = too bright

Bowens 3.0 - Reading f8.0 - Camera f8.0 = too bright

Bowens 3.0 - Reading f8.0 - Camera f9.5 = too dark
Bowens 3.5 - Reading f8.0 - Camera f8.0 = too bright  
Bowens 3.5 - Reading f8.0 - Camera f8.0 = too bright 
Bowens 2.75 - Reading f4.0 - Camera f5.6 = too dark
Bowens 2.0 - Reading f4.0 - Camera f5.6 = too dark
Bowens 2.0 - Reading f8.0 - Camera f8.0 = too bright

I think the evidence shows I'd lost the plot. Here he is, the very patient farmer.
80mm, f11.0 (I'd not gone for depth of field because it was a portrait - seeing as the background is white it begs the hindsight question of why not). f11.0 reading on the lights and Farmer's yer uncle.

2.6 Tilt Shift Trial - Photoshop Method

Having observed some images, Jim showed me a couple of his images done using Gaussian blur in Photoshop. So I decided to have a go myself using an old image of Santorini (after perusing a few candidate images).

I'd shot the original image in aperture mode at f22 at 28mm, the widest angle I could get - because the shot was of buildings moving away from me (and I wanted some of the opposite side of the Island in) I wanted maximum depth of field.

Here's the original image, tweaked a little in Lightroom for exposure and 'blacks'.
Photobucket

I then used Lightroom's 'Vibrance' and 'Clarity' (both at 75) to really pump up the colour - which gets it half way to that 'miniature' or 'model' world effect. A large dollop of sharpening was also added as I thought that defined edges would add further to the 'model' look.

The image was then exported to photoshop. Here I used Gaussian blur (1.6) to isolate a central strip of the shot to make it appear 'in focus'. For the background and sky I added more Gaussian blur (4.3) to try and give the village a 3D type effect. And here it is.
Photobucket 
I then decided to go over to Ros Forest  and saw the following opportunity for a 'Tilt Shift' shot. Now knowing that I need narrow depth of field I shot on aperture mode at f4.0, focusing in the bridge (the central theme). To crop out unwanted areas I had the lens at 44mm (as wide as I could go). Getting a really wide angle increases depth of field and maximises the 3D effect.
 Photobucket

This one gave me invaluable learning. One of the requirements for creating good 'miniature images' is to get high above the subject - although I stood on a bench it just wasn't high enough. Equally I shot too close to the subject.
This shot required much more Gaussian blur. 7.0 for the background, 5.0 for the foreground and 3.5 for the near centre. It's all a bit too heavy handed. But hey I'm learning (I'll know what to do next time).


Photobucket


Revisited this after some advice from Jim ('ll fix it) via the comments boxes. Got the Gaussian blur up to 15 on the outside down to 2.5 nearer the bridge. Clarity & vibrancy at 75, and upped the Green, Blue & Red channels. I'm quite pleased with it.

Photobucket
Found a tutorial on tiltshiftphotgraphy.net and applied it to the same image - as follows and forsaking all modesty I prefer my own technique - the focus/blur is to parallel for me (the rectangle looks too obvious to me. However, I did use lens blur with this and Gaussian with the other, I much prefer the effects I was getting with lens blur. So, a merge of the two techniques is my way forward. For further info the tutorial suggested using a saturation layer and a curves layer. Whilst I found the saturation useful, I tried a levels layer and preferred it (even though I've clipped some darks and highlights).


Oh no! it's not the same picture. Right lets do it again with the right picture.


4.1 My Portrait Theme Choice - CANCELLED

These influences have lead to my portrait theme choice "You Bring It To Life".

The underlying idea is a 'travel advertising' shoot. Using shadows/silhouettes to depict iconic locations e.g. the Eiffel Tower, the Statue of Liberty and safari animals. By introducing people in full colour, in typical holiday regalia, the contrast then supports the tag line "you bring it to life".

What is a Silhouette? - well according to the fountain of all knowledge - Wikipedia "A silhouette is a view of an object or scene consisting of the outline and a featureless interior, with the silhouetted object usually being black. The term was initially applied in the 18th century to portraits or other pictorial representations cut from thin black card". Perfect.


The term has also (from the same source) "....been extended to describe the sight or image of a person, object or scene that is back lit, and appears dark against a lighter background. Double perfect (if a man can say such a thing).


This effect has been used to create a very specific genre of theatre "shadow". Its history can be dated beyond the 13th century in China. Today there are over 20 countries with 'troupes' performing the genre.' Pilobolus' are an American troupe originating from New York City. Following widespread exposure on US TV, they have since appeared around the world, featuring on
the UK's Royal Variety Performance show of 2009.


The following images show how the effect can be created.


Because a silhouette emphasises the outline, the word has also been used in the fields of fashion and fitness to describe the shape of a person's body or the shape created by wearing clothing of a particular style or period.

Because of the limitations of studio space I will need to back light 'small' silhouettes to then projected 'larger' shadows on to a white background.

Portrait Shoot - Lighting Plan

Here's a lighting plan for my portrait shoot - thanks to Kevin Kertz for making the psd. freely available online  - click this link to the source) Kevin Kertz's Set Up Plans (psd. file).


Two beauty boxes were used to create soft light and soft shadows. The plan to produce composite images to support the 'women in business' campaign meant that and long, hard shadows would cause problems when I came to create the composites (I'd end up removing them in PhotoShop).

The boxes were positioned one above the other - to provide the option for just lighting head and shoulders or full body. The latter is required to when the model poses in full traditional dress, to bring out the colour and produce some highlights and reflections off of the gold embroidery.

A Canon EOS 5D camera fitted with an EF 24-105mm f4L IS USM lens was used on the stand that was also used for my product shoot (which was shot before this one). The camera belongs to the college and the lens provides better quality images than my Nikon D70 and Nikon 28-50mm lens combination. The longer length of the Canon lens provides a softer image, which is great for model / wedding and portrait shots.

The shots were mostly taken at 90mm (although planned at 100mm). I am still in the habit I learned from reading Cartier-Bresson "don't crop in the darkroom, take the picture as you want it". It's a hard habit to break, learning to take a wider shot and crop later.

Shutter speed was set at 1/100 sec - a fairly standard setting in the studio, fast enough to minimise tungsten (although all tungsten are off and only modelling lamps used) and not so fast that it closes down before the flash has fired (yep I've read about that shutter sync problem). Aperture at f5.6 gave a narrow depth of field - again helpful with the composites. The light at this setting is the driver of the aperture and was at f8 - previous history with this camera - lighting combination suggested and opening the aperture a little further to avoid the background becoming too dark (and it still doesn't burn out).

ISO 100 allowing sharp images and minimising noise.

The Model is c8' away from the background so that light does not hit it with any significance.

3.1 Product Shoot - The Set Up

The studio comes readily equipped with 4 x Bowens Gemini Esprit 500 lamps. See the separate blog 'Lighting & Equipment' for a more detailed description of the use of each piece of kit.

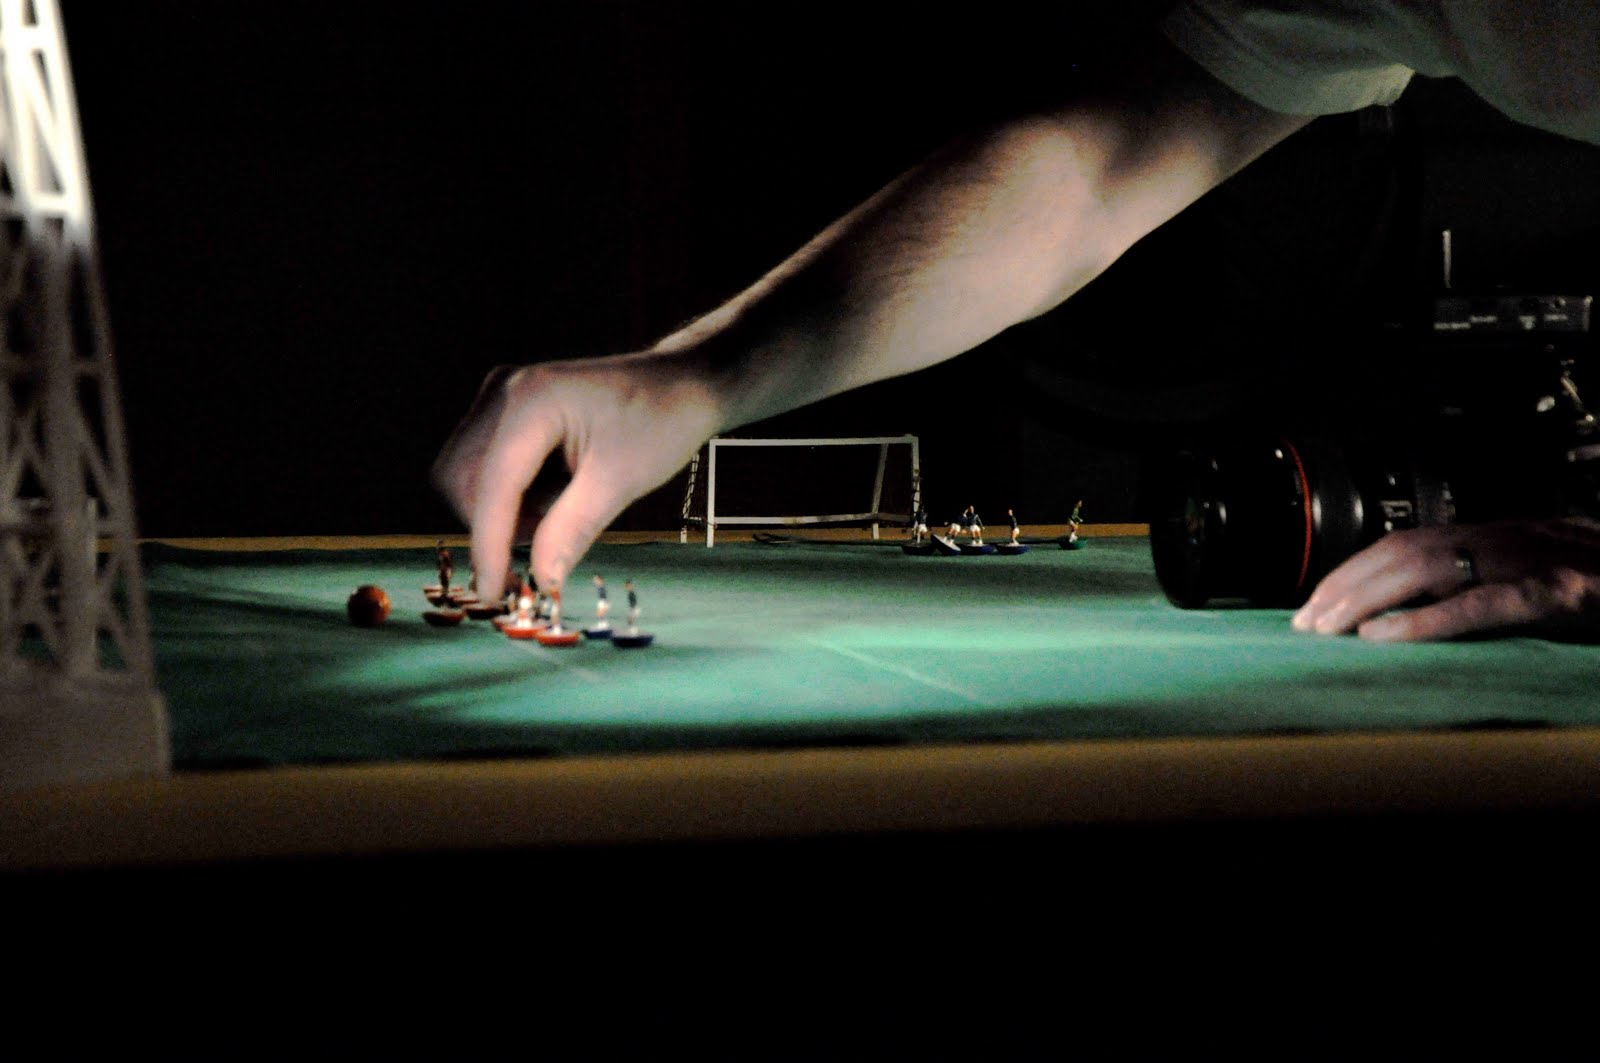
Here's the first set up for the shoot. The two spots will be used to emulate the floodlights, whilst at the other end of the pitch I will use diffused light so the light travels along the pitch, removing heavy shadows, but does not intrude.


This shot shows the positioning of the spot light behind the floodlight. This was done for both sides of the pitch at that end.


Now the diffusers are clipped to the Bowens (the Barn Doors still gave too hard a light).


A few tests of the lights, some minor adjustments to apertures - f5.6 used to get a narrow depth of field, and here we are ready to go. The separated blog on my trial shoot product shoot contains an extensive details of my experience with aperture and light settings / readings.


Time to get the players in the right positions that will simulate 'real life'. Not all of the images will make the final selection, but for the record - I tried penalties, free kicks, fouls, tackles, goal celebrations, and arguments.


Shooting in action, getting in close with a narrow depth of field to simulate the tilt shift effect - although of course with actual models.


Helmut Newton - Portrait Inlfuences

Helmut Newton's 'They're coming" is a major influence on my final Portrait choice.


The images alone portray the very story - and that's the power of images of course. Whether this was Newton's intention is much debated. The sequence was given the title by Vogue after publication of the images in 1981. Newton certainly portrayed women as dominant and strong, never forgoing beauty and his personal attraction to stilettos and high heeled shoes - revealed in his own words "When I look at a woman," said Newton, "my first glance goes to her shoes and I hope that they are high. High heels make a woman very sexy and give her something threatening." It is also said that Newton took pictures only for his own pleasure and there was nothing altruistic in his work.

We can see that the almost exact replicas have different lighting. This is because Newton had used sunlight coming in through the windows. It does tell us that they were dressed for the first shot and naked for the second. On closer inspection the third model from the left has reversed her leg position.


The use of 'passive' backgrounds allows the models to fully dominate the image.


Horst P Hort's famous corset image portrays a time when the female form was desired but given trusses and girdles. Since Newton's image women have taken to gyms and sports once the reserve of men.

In my shoot I aim to show the transition of everyday women in to business. Whilst women have been in business for some time they have long been perceived individually as 'a woman in a man's world' (we can all hear the song).

Now women are entering in to the business world and bring their femininity with them. I aim to suggest that they should also bring their culture and every other facet of themselves to their work place. This will meet, and perhaps challenge, the call for diversity in the workplace.


Newton, of course is famed for his female nudes, adoration of the female form and controversial construction of images including guns, implied lesbianism and sado masochism. My portrait choice is about about emancipation and liberation. For this reason I will limit exploration of Newton's images to a slide show.

I have selected images that I believe show women as strong characters. Adopting poses that at the time would be considered very masculine - drinking beer at a fast food stand, touting guns and wearing masks or heavy work boots, mastering wild dogs - all with confident body language (eye contact, tilt of the head, pointing of the legs and toes, facial expressions - it's all there), .

N.B. This not a censorship, editorial or moral decision, simply that the images do not further support my intended outcomes.

Newton also worked in colour but it is these B&W images that most resonate with my own theme.

The images are all strongly lit with the light almost washing out the features. Perhaps a tip of the hat by Newton towards modern airbrushing, a desire for perfection in the female form.


4.1.2 Portrait Shoot Planning & Storyboard

The storyboard consists, of the following 10 shots.

In order of shoot, they will be re-arranged for the storyboard after the shoot (see comments at end of list);
  1. Model standing in traditional dress facing forward (for half and half image - both face and full length) - Also capture hard/defined shadow.
  2. Model sitting on chair in traditional dress (face forward)
  3. Model sitting on chair in traditional dress (side on)
  4. Model walking in traditional dress (towards future self) (towards camera)
  5. Model walking in traditional dress (towards future self) (sideways to camera - left to right)
  6. Model making traditional greeting (towards future self)
  7. Model, in traditional dress, holding hands with future self
  8. Model disrobing traditional dress e.g. removing headscarf or letting hair down, as she walks towards future self
  9. Model standing leaning against white wall, in business dress (face forward and side on)
  10. Model walking in business dress (towards future self) (towards camera)
  11. Model walking in business dress (towards future self) (sideways to camera - left to right)
  12. Model, in business dress, making handshake with future self
  13. Model, in business dress, holding hands with future self 
  14. Model standing in business dress facing forward (for half and half image - both face and full length)
  15. Shot of traditional shoes (table required)
  16. Shot of business shoes (table required)
  17. Shot of business bag (table required)
  18. Shot of business phone e.g. Blackberry (table required)
Comments
Positioning for shots 1&14, 6&13 and 7&12 will be critical for matching up. Same focal point, distance from lens and lighting.

The model may choose to start in business dress and then move to traditional dress so the order of shots will need to be flexible (considerations of make-up etc). I could ask in advance of course, however, its part of my plan to help the model feel comfortable on the day by involving her in the shoot. Naturally, I'll be taking advice from her as regards to the 'poses' to be adopted. The model is a passionate member of 'Women In Logistics' and as such is 'surrogate client'.